ValQ Collaborate offers multiple data access options for exporting the data, model, scenarios, analysis etc. Data access option enables you to perform adhoc analysis outside of ValQ ; use ValQ data for downstream applications. For eg, you can use ValQ data for other Power BI visuals.
Let us first take a quick look at the different options.
- Writeback
- Export as Datasource
- Download as Excel
- Import & Export Models
In this blog, we’ll look at each of them in detail:
1. Writeback:
One of the key features in ValQ is the ability to writeback your scenario, simulation data and planning series to a database. The writeback option enables planners to integrate ValQ’s planning and what-if simulations with their business workflows.
1. Configure URL:
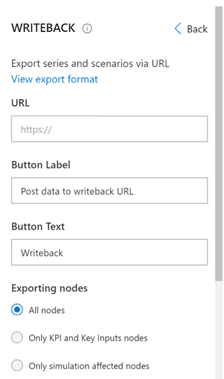
Writeback allows you to export the scenarios and data series to your backend systems. The first step involved in the process is the configuration of the URL.
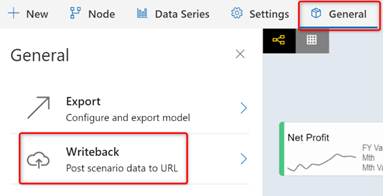
In Model > General > Writeback, you can see the settings as shown below. You can select to export all nodes, only KPI and Key Inputs nodes or only simulation affected nodes.
2. Perform Writeback :
a. Planning Series :
To writeback planning series, go to Plan > Writeback as shown below.
b. Simulation :
ValQ provides you the option to writeback the data of the entire model or just the Key Inputs and KPIs.
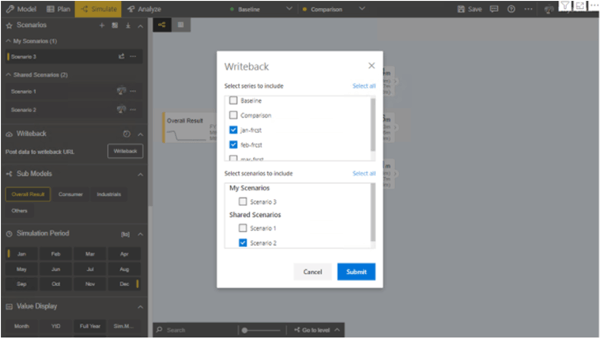
Once the model is configured, choose the Writeback feature in the Simulate > Navigation Panel section on the runtime.
Here, click the ‘Writeback’ button. Choose the Series and Scenarios that you want to export to the URL . After making the selection, click ‘Submit’.
2. Export as Datasource:
Export as datasource allows the scenarios and data series to be made available on an URL. With the export as data source option in ValQ, you can :
- Export the data from ValQ by creating a web data source.
- Import the data back into Power BI (Using Power BI’s “Get Data from Web” feature) or any other application for further analysis.
- Live Sync simulations with the export URL that fetches real-time data.
Click on the 3 dots next to your user profile and select “Export as datasource”. From the dialog box, choose the scenarios and series that needs to be exported.

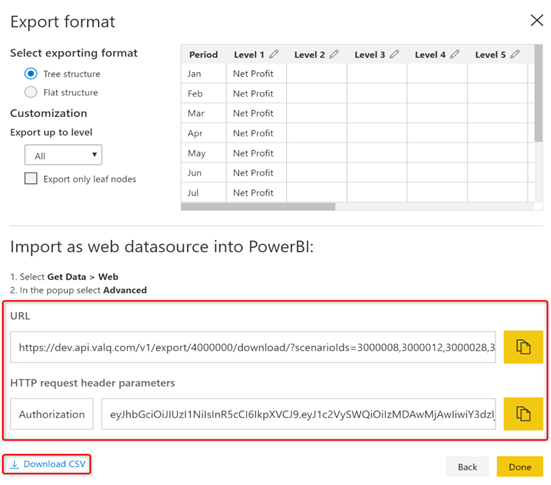
The data can be exported in either a Tree structure or a Flat structure as shown in the Export format screen. In this example, the data is exported in the form of a Tree Structure.
There are several other customization options available as shown below.
To import as web datasource into Power BI, you can use the URL and HTTP request header parameters. You can also download as a CSV file.
Watch this short video to learn how to write-back your budget & forecast data from ValQ to other Power BI reports seamlessly.
3. Download Excel:
With ValQ, you can download your scenarios and analyses into an Excel file.
a. Scenario Download:
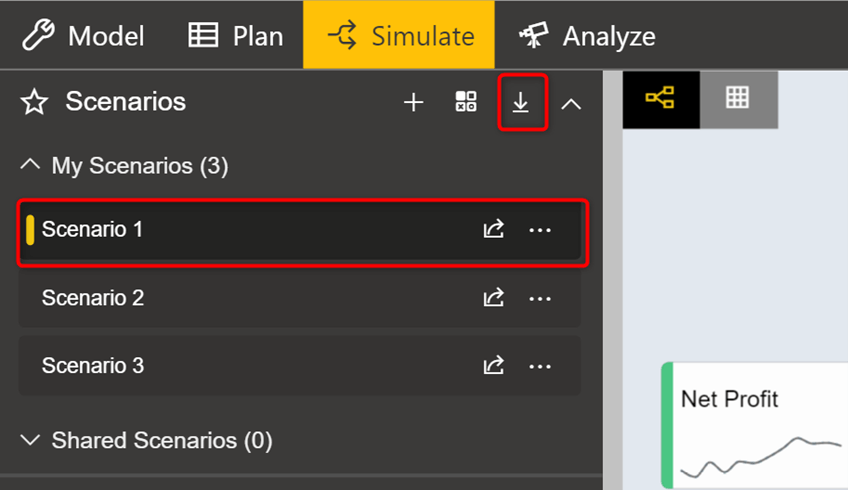
In the Simulate tab, click on the scenario you want to download. Click on the ‘Download’ icon as highlighted.
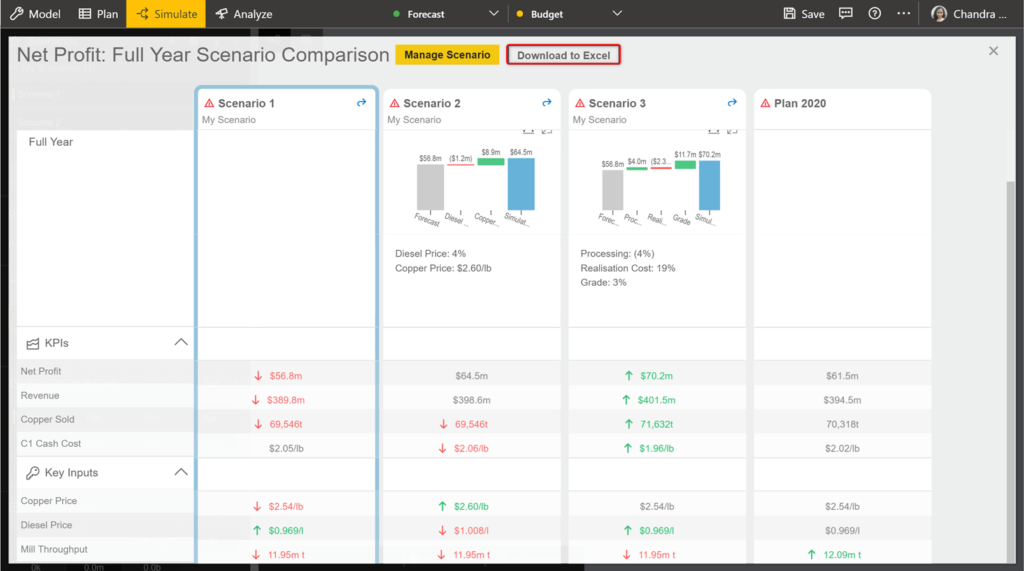
To download multiple scenarios (both ‘My Scenarios’ and ‘Shared Scenarios’) and data series (including ‘Planning Series’), click on the ‘Compare Scenarios’ icon. in the Scenarios section of the Navigation Panel. Then choose the required scenarios from the dialog box.
You will be able to download the scenario comparison data from the dialog box shown below by clicking on the ‘Download to Excel’ option.
b. Variance Analysis Export
In Analyze tab, go to ‘Variance Analysis’. Once you perform analysis, click on the ‘Download as excel’ option.
4. Import & Export Models:
a. Quick Editor Export
While configuring models, you can export the model configurations from the Quick Editor, configure nodes in excel and reimport it.
As shown in the below image, go to Model Tab. Under the ‘Node’ option , click on ‘Quick Editor’.
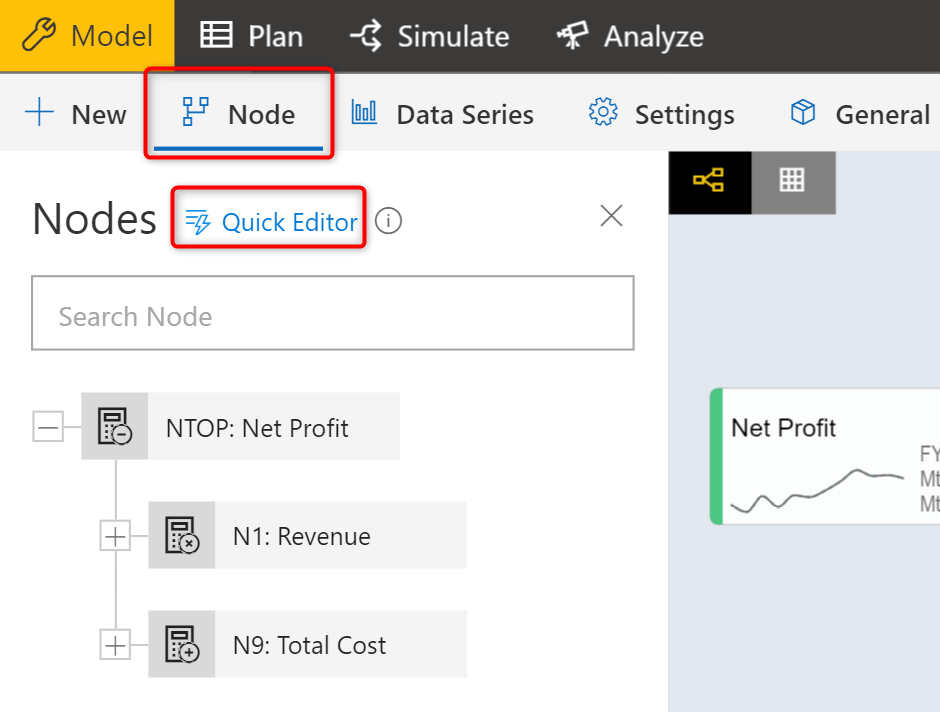
It will display a pop-up showing details of all the nodes.
Before exporting the configurations, we first need to choose the properties/columns we need to configure. Click on ‘Manage Columns’ and from the dialog box, choose the desired columns.
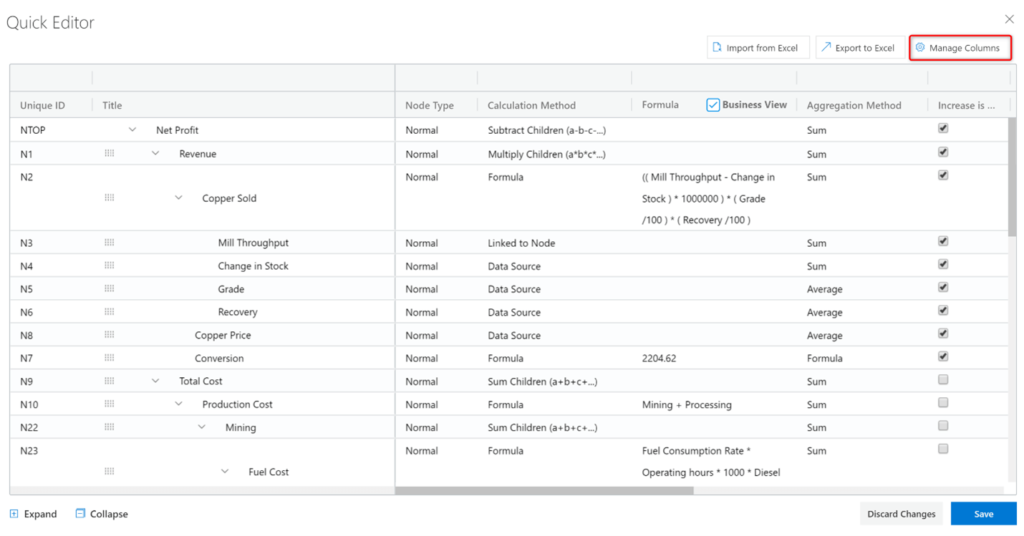
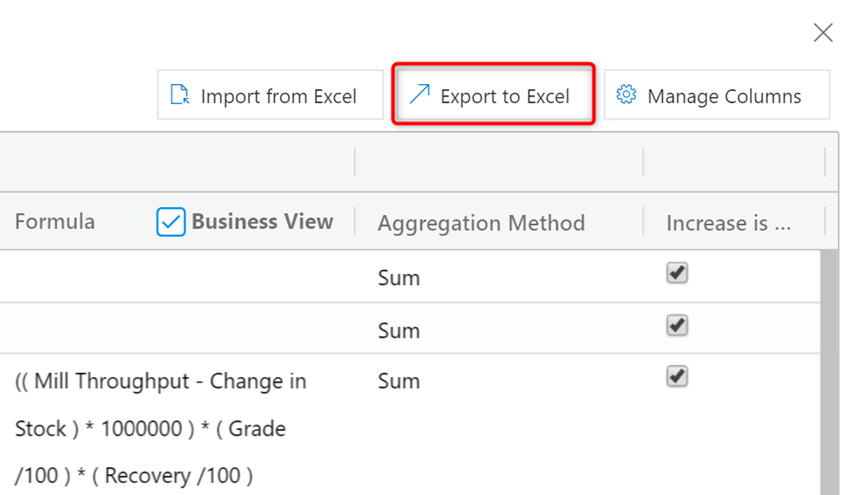
Once the columns are selected, click on ‘Export to Excel’.
In the exported file, you can add, reorder, delete nodes. Once the configuration is complete, go back to Quick Editor and import the excel file to update the model.
b. General Export
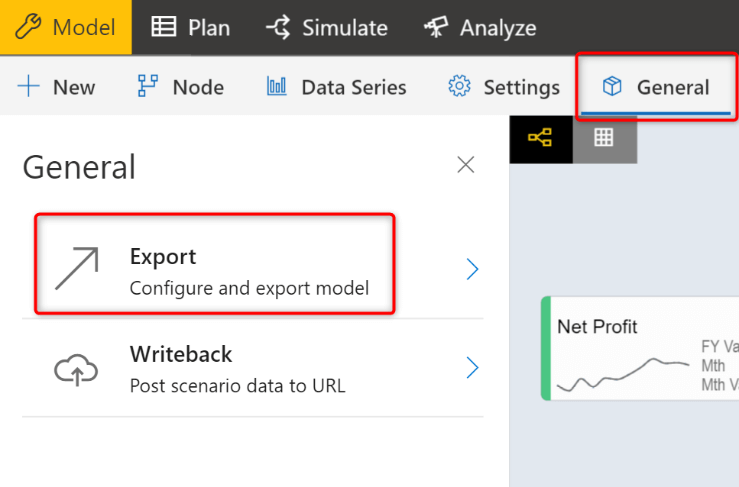
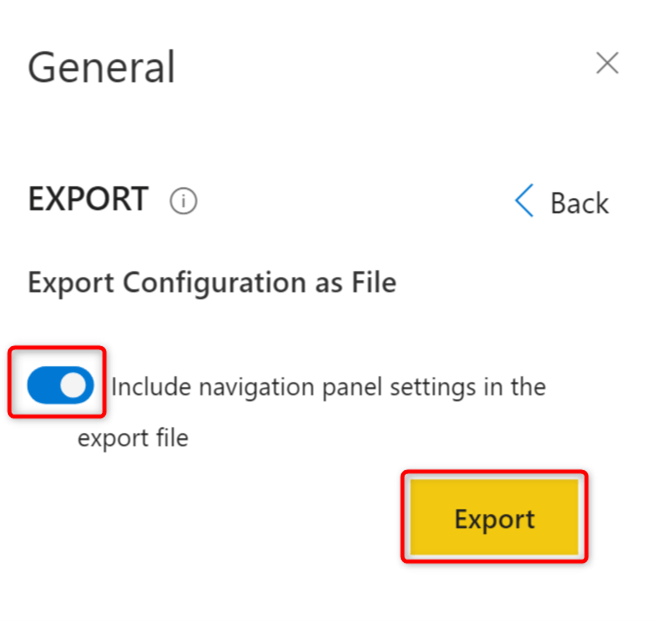
With the General Export feature, you can export the entire model along with the settings and later can be import it. Under ‘General’, select ‘Export’ and choose to include navigation panel settings if needed and click ‘Export’.
A pop-up with encoded text will appear. You can copy the encoded text and then import it to recreate the model anytime.
Download the latest version here and get started with ValQ Collaborate Edition today.
