
With ValQ, you can consume data residing in excel files, small business applications (e.g. QuickBooks), cloud applications (e.g. Salesforce), databases and enterprise systems (e.g. SAP BW) and more. In this blog, we’ll look at the three different ways of mapping ValQ nodes to data.
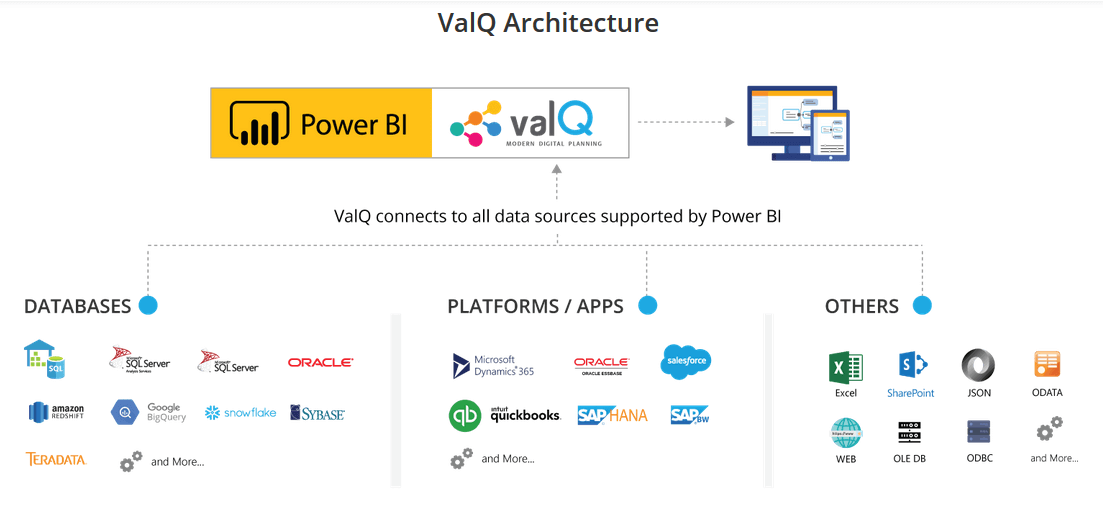
While typical spreadsheet data may only contain text fields (e.g. Sales Rep field will contain names of the sales representatives), most often data coming from data warehouse platforms contain ID & text fields (e.g. one field with Product ID and another field with Product Name). We’ll explore the latter scenario in the blog, as it is a superset of the former.
Let’s take into account a dataset like this, with the fields account id, account description and 12 columns of forecast data, followed by 12 columns of budget data. (The budget & forecast data are not fully shown in the image).

Now you can map ValQ nodes to the data as follows:
1. Map the node to the text field
In this method, you would first map the Account Desc field to section Category.
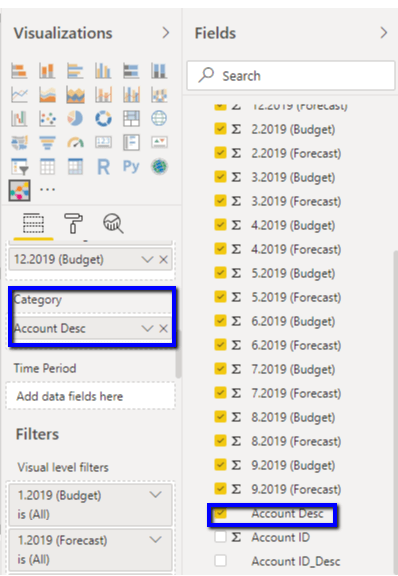
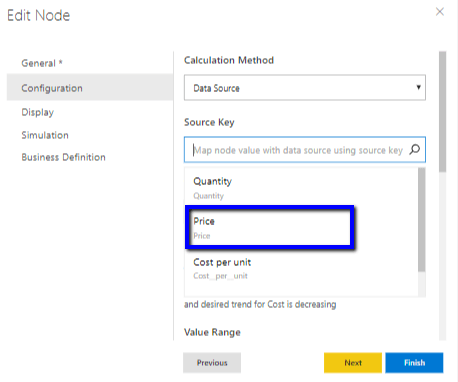
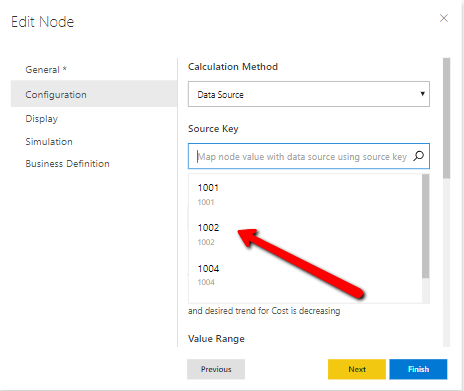
Now when you try to map a node to the data (under Edit -> Configuration -> Source Key) the list of category text values are displayed.
With ValQ, you can consume data residing in excel files, small business applications (e.g. QuickBooks), cloud applications (e.g. Salesforce), databases and enterprise systems (e.g. SAP BW) and more. In this blog, we’ll look at the three different ways of mapping ValQ nodes to data.

While typical spreadsheet data may only contain text fields (e.g. Sales Rep field will contain names of the sales representatives), most often data coming from data warehouse platforms contain ID & text fields (e.g. one field with Product ID and another field with Product Name). We’ll explore the latter scenario in the blog, as it is a superset of the former.
Let’s take into account a dataset like this, with the fields account id, account description and 12 columns of forecast data, followed by 12 columns of budget data. (The budget & forecast data are not fully shown in the image).

Now you can map ValQ nodes to the data as follows:
1. Map the node to the text field
In this method, you would first map the Account Desc field to section Category.

Now when you try to map a node to the data (under Edit -> Configuration -> Source Key) the list of category text values are displayed.

However, this approach has some drawbacks. It is very common in enterprise environments for several products with different ids with the same text description (even when it is not supposed to happen). Also, if someone modifies the text for some reason, our mapping would no more remain valid.
2. ID-only mapping
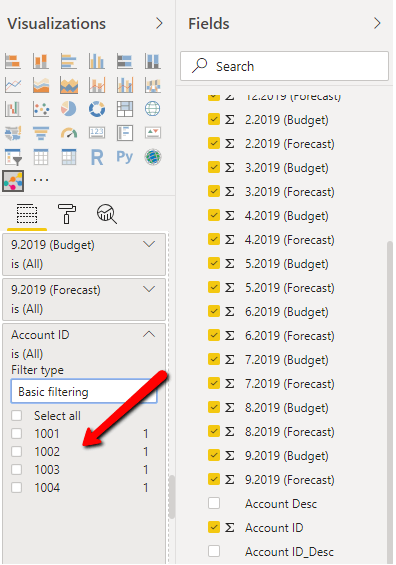
The second option is to use map the node to the data source using the ID column. To do this, add the Account ID to the category field.
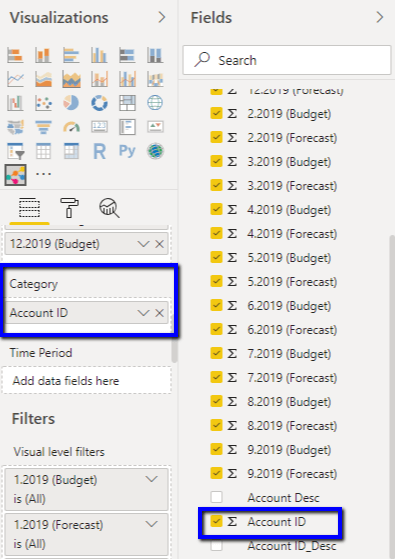
When you try to map the node to the data (Edit -> Configuration -> Source Key), the ID will be displayed.
While this method makes your model immune to any accidental changes to master data text, this method suffers from a couple of drawbacks.
1. It is not very intuitive for users to work with IDs.
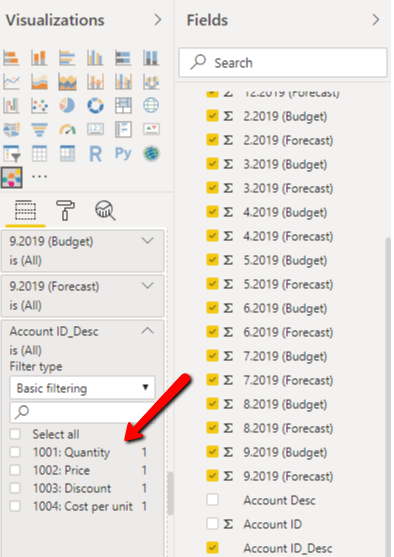
2. In the filters section (refer image), only the IDs will now be displayed which presents another usability issue to users.
3. ID-Text mapping
To avoid the pitfalls of both the above approaches, we decided to introduce a third method. While it is not mandatory to use this approach, this is our recommended way.
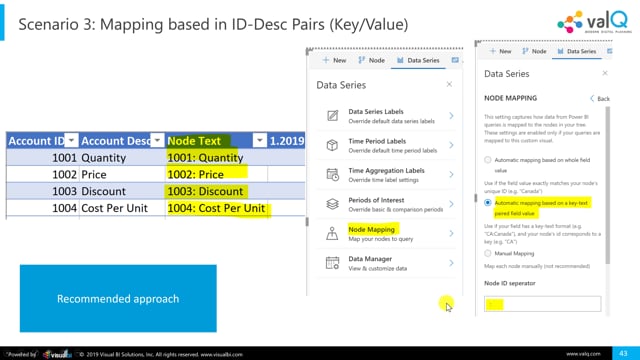
In this method, we use a concatenated string that contains both the ID and the text.
In our case, we have the Account ID and Description concatenated with a separator “:”.

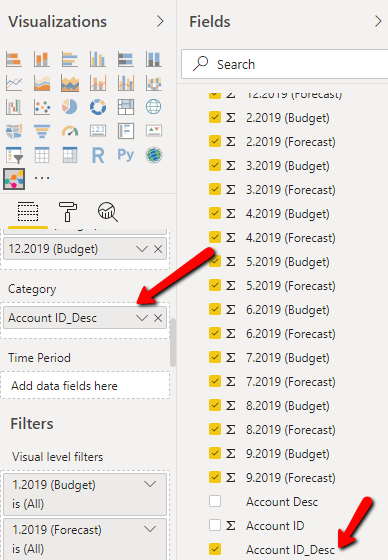
Now map the concatenated ‘Account ID_Desc’ against the Category field.
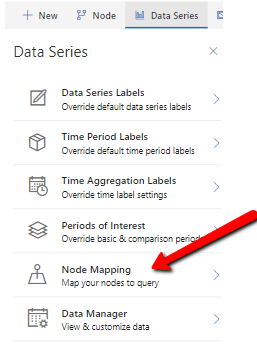
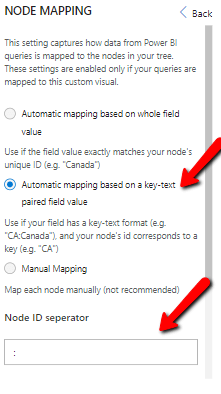
Next, under Data Series -> Node Mapping, ensure that this property ‘Automatic mapping based on a key-text paired field value’ is selected.
When you now try to map a node under Edit -> Configuration -> Source Key, you can search using the account description but once selected, it only displays the account ID in the source key section.
The benefit of this approach is that the filters would now show the concatenated values making it very user-friendly.
****
ValQ delivers a great user experience to the business users. To know more about how ValQ connects to Enterprise Data Warehouses like SSAS Cubes, Azure SQL DB, Azure Analysis Services, SAP BW & SAP HANA, tune into our webinar here.
To learn more, tune into one of our ValQ Webinars or try our product for free here.


